newlife_ks
Oud Junkie

Posts: 119
Registered: 6-12-2016
Location: Germany, NRW
Member Is Offline
|
|
Oud stand
Hello everybody!
I'm from Germany, and about two months ago I decided to buy an oud. Having played cello and guitar I thought this would be a fine instrument combining
my experience with and without frets. And it is! I ever loved the sound, so now here it is, and I love playing it.
I only had problems with its position on my right leg, and despite using a foot stool the rounded body used to slip out of position. What could I do?
I visited an old friend of mine who used to play lute years ago but discontinued playing, but he gave me a very interesting hint to youtube and said
hey, listen to that lute duo, they're great. So I did, listened to their stuff on http://www.luteduo.com and youtube, and there they showed the world how to make a really good lute strap.
https://www.youtube.com/watch?v=C03fsBh5IUg
The most interesting part was that they used some kind of anti slip mat on their right leg! That was the best hint I could get! So I bought some of
that stuff, cut a 30 x 30 cm piece, and putting that on my upper leg the oud stopped slipping! Only disadvantage still was that the small piece fell
off my leg when I stood up to reach for my metronome or whatever. So I thought a little and decided that some kind of cuff would be the best. My
girlfriend sewed it for me, and wrapped around my leg (with some velcro tape sewed to fix it there) nothing does slip away anymore.
I thought it might be helpful to some of you too. Since I'm from Germany it does not make much sense to give you any link for the product I used,
better search for yourselves!
But there's something else I wanted to show you. I wanted an oud stand, but I did not find anything on the web to my full content. DIY was the answer.
Here's the procedure:
Take two pieces of plywood, about 6mm thick. Don't take that multi layered kind, it might be too heavy. I used a three layer type, two thin layers
outside with a single 4mm layer inside which is very light but stable enough to bear the lightweighted oud. I made the pieces 35 x 30 cm, 35 cm for
the bottom side. Apart from that you need a small hinge. Mine is 40 x 15 mm when folded. Some screws for fixing it. Furtheron a can of black spray
varnish. (Is that the right word? I did not know how to translate "Spruehlack" into english.) And - most important! - a piece of soldering tin! Not
that very thin stuff, mine was about 2 mm. You also will need felt and glue for cushioning, some kind of braid and maybe some shirr.
At first you need to decide where the oud should rest on the stand. I chose a point where the end of the soundbox starts to curve away from the
straight part, which was about 24 cm with my oud. Now the soldering tin comes into action! But I'd better insert a picture first to give a better
understanding what the stand looks like.
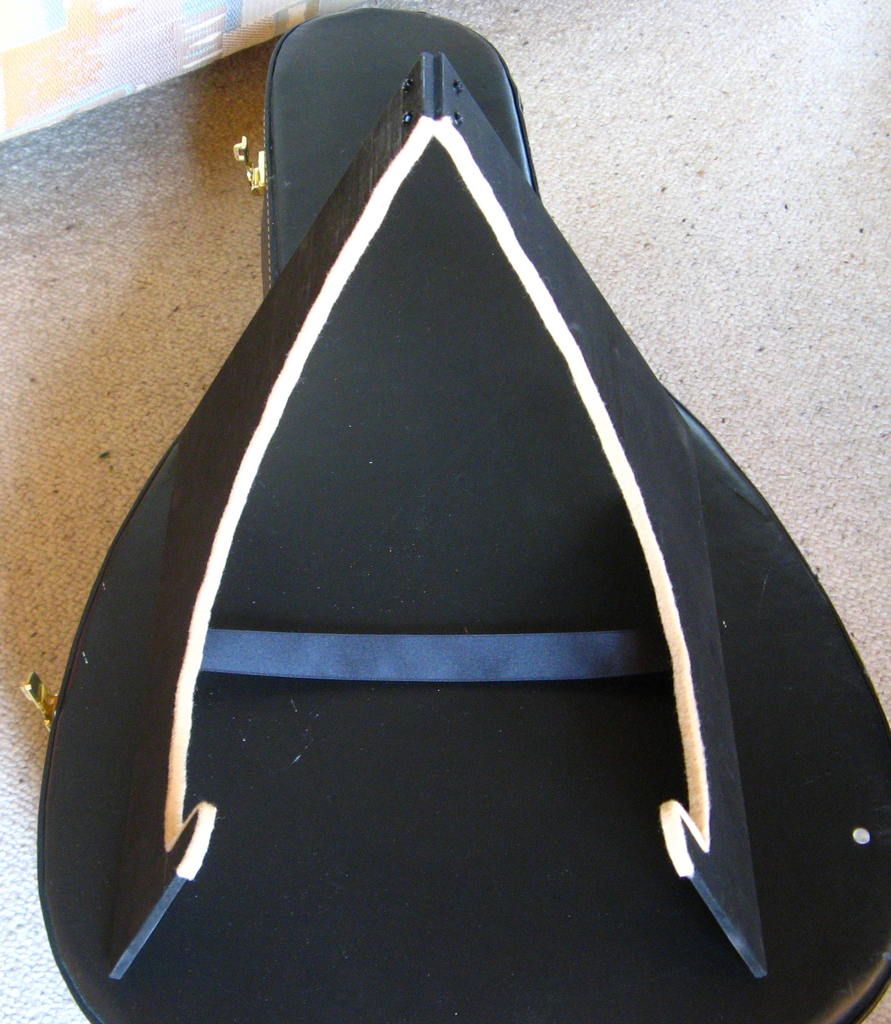
As you can see I decided to exactly fit the stand to the oud's body. And nothing does the job taking the outline better than solder. Just put one end
in the middle of the oud's back und from there diagonally across the body to the point where you want the stand to be. Fold the solder about 5 cm onto
the soundboard, just to give you the angle. Resting on the stand my oud's soundboard has an angle of about 75°.
Now take the solder without deforming it and place it onto one of those plywood pieces where you want it to be. I only give you rough details, since
you might decide to give the stand different dimensions. As well the back where the hinge is as the bottom too are about 55 mm with my stand. When you
positioned the solder, just spray a layer of black or whatever colour you might prefer over the solder. This gives you the perfect outline of your
oud's back. Before you start working with your jigsaw, don't forget to allow for the thickness of your felt upholstery, which is about 3 or 4 mm in my
case. So - don't saw ON the line, but calcultate the felt!
After having sawed the two pieces you're nearly done. Ahh, sawing! I nailed the two parts on each other where the sawed parts fall off, so I only had
to saw once.
Then you might sand the outlines a little, you don't want wood splinters, do you? Afterwards paint the parts.
Now you cut the felt into stripes and glue the pieces to the two parts where you put the oud. I don't know how to name the glue, in german it is
Pattex, it's that kind of glue that has to dry for ten minutes before you press the parts together. Make the stripes 8 mm when you have 6 mm plywood
to prevent accidental scratches!
Now you only need to fix the hinge and some braid on the bottom to keep both sides together in the position you measured. Done.
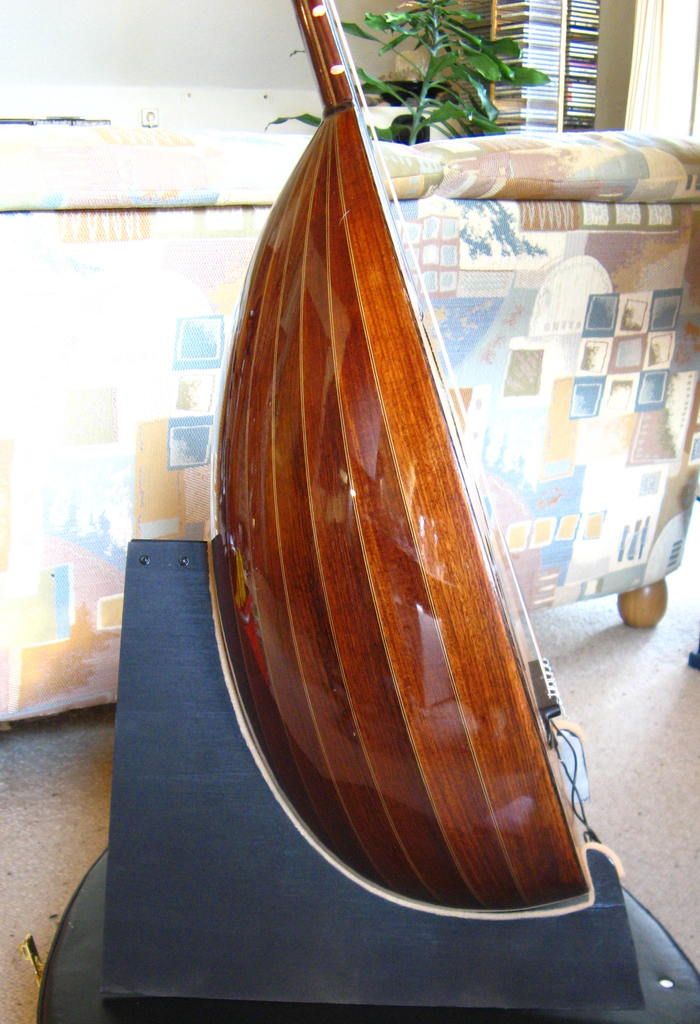
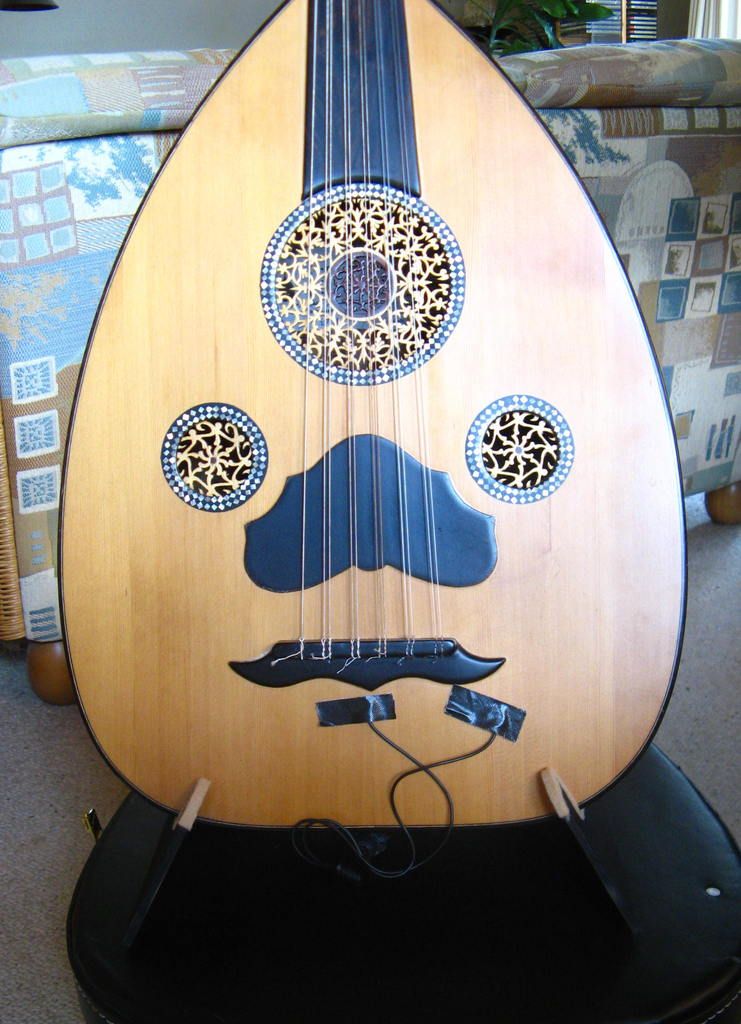
When I put my stand into a cotton bag, it fits beneath the oud into the case.
Not shown in the photos yet is the shirr (Correct word? Elastic band 2mm thick, wrap spun?) I glued between the hinge. At the upper end it has a loop
I can put onto the pegbox above the upper two pegs. This might prevent accidental tilts by your children or dogs or whatever. It even enables me to
take my oud from the terrace where I often play into the house without removing the stand, because it is really that light!
And now - I wish everybody success building his own highly individual oud stand!
Klaus
|
|
|
MattOud
Oud Junkie
Posts: 297
Registered: 1-18-2017
Location: Ontario, Canada
Member Is Offline
Mood: Feeling Pretty G'Oud
|
|
This post is BRILLIANT!
On another forum I am involved with, the admins started a new thread called a global index which takes the best threads an indexes them into one spot
for easier finding of good tips and such.
We really should consider doing it for this forum and having posts like this one included!
This DIY stand is AMAZING!!
Great work!
|
|
|
newlife_ks
Oud Junkie
Posts: 119
Registered: 6-12-2016
Location: Germany, NRW
Member Is Offline
|
|
Thanks for your enthusiastic feedback, MattOud! Indeed, after more than 1300 views this thread finally has feedback, I had given up hope for a reply
after more than one year from posting this. So I'm very happy to have at least one comment for now. 
This post was also intended to encourage more of you maniacs to make your own stand. So if there is anybody here who plans to build his own replica -
please post your results, combined with some pics. And if you have ideas for optimizing - you're very welcome!
Greetings from Klaus in Germany!
|
|
|
|


